
A True 2.5D Engine
It's been more than a month since Part 3 in our 2.5D game blog series adventure, but I left us on a big cliff hanger! In this post, we'll walk through the core elements of how we designed our game engine to satisfy our 2.5D needs.
Part 4: How Did We Do
Over the course of this blog series, I have danced around three axes of consideration for engine implementation: 1) 3D physics, 2) rendering order, and 3) level editing. These three are not intended to be comprehensive, but they will help us organize our thinking about design of this engine.
I want to note that the traditional layer-based 2D engine generally nails two of these three. (2) Layer-based 2D engines don't have difficulty with rendering order because layers can be rendered in order and sprites can easily be sorted on the same plane. (We talked about this some in our bonus round post early in the series.) (3) Level editing is natural because the 2D plane of the game world maps directly to the 2D plane of developer's computer screen. (And to manage the complexity of multiple layers, individual layers' visibility can be toggled to only show a subset of all layers at once.)

Since the traditional layer-based 2D engine isn't completely broken and since it has some serious plusses, we'll start with that model as our base understanding of how the engine works and modify from there. 3D physics are the real problem not solved by traditional layer-based 2D engines; so that's where we'll start with modifying this base design.
Designing for 3D Physics
Previously, each entity in the world was allocated to a single layer and then given x and y coordinates within that layer. Each of these layers' coordinate systems were layered directly on top of each other. For 3D, we really don't want to be thinking in terms of discrete 2D planes.
So step 1? Ditch layers.
In lieu of layers, we need to have a third coordinate to track each entities position in 3D space. On top of that, each entity also needs to have a specified height (z axis) since each entity should no longer be represented by a 2D area but by a 3D volume. Now is not really the time or place for me to go into the details of how collisions work, but suffice it to say (for now) that we can use these two additional pieces of information associated with each entity in the world to properly handle 3D collisions.
Designing for 2D Rendering of 3D World
That's great and all that we could solve the 3D physics problem by just tracking a couple extra pieces of data, but what about rendering? Before, we could just render the sprites in y-axis order from starting with the bottom layer and finishing with the top.
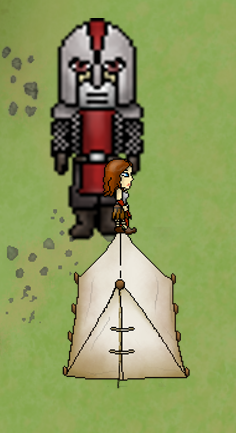
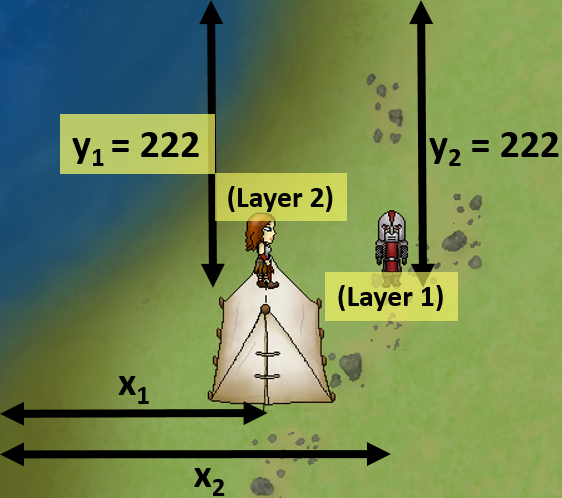
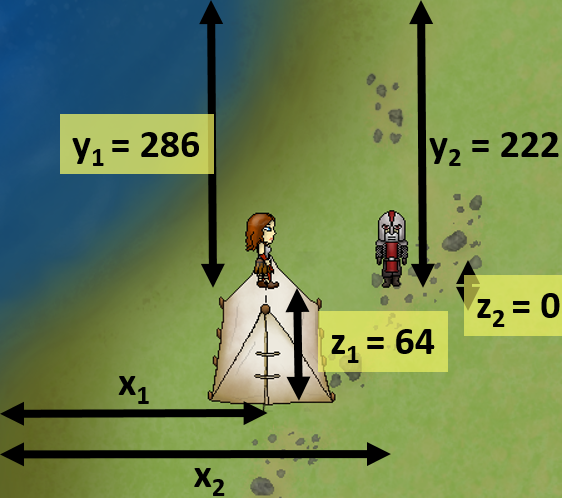
Consider the scenario in this picture: Sasha is standing on the edge of the top of the tent (halfway falling off), and there is a giant soldier behind the tent floating a few pixels off the ground ('cuz why not).
The correct rendering order of the three entities is (1)soldier, (2)tent, (3)Sasha.
- Middle of hitbox:
(1)soldier, (2)Sasha, (3)tent. No bueno. - Bottom edge of hitbox?
(1)soldier, (2)Sasha, (3)tent. Hmm. -
Top edge of hitbox???
(1)soldier, (2)Sasha, (3)tent. Aggghhhh!!!! If Sasha just weren't standing on the edge, this would work!
- Bottom?
(1)tent, (2)soldier, (3)Sasha. Survey says: *buzzer*. - Top?
(1)tent, (2)Sasha, (3)soldier. Bummer.
Obviously there has to be a solution here, because we could (as humans) figure out the appropriate ordering. However, I'm trying to demonstrate with the attempts above that the problem can't be solved with a simple sorting algorithm because typical list-sorting algorithms operate on a single value for each item in the list. However, as Andrew Russell brought to my attention, the problem can usually be solved by implementing a graph-based sorting algorithm which compares individual entities to each other. This part of the engine is still in development; so I unfortunately can't speak directly to implementation of this at the moment.
Designing for 2.5D Level Editing
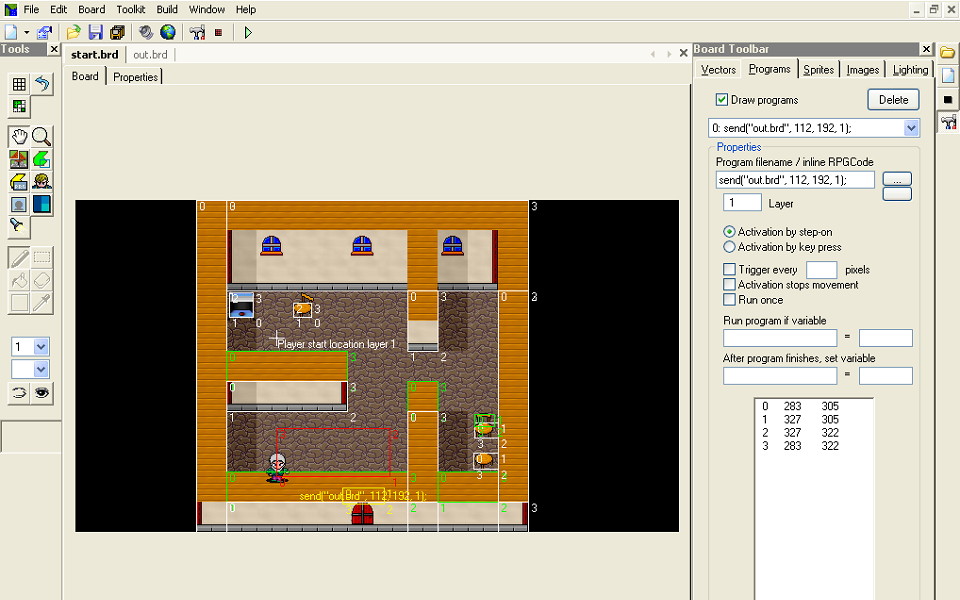
It may not have been super clear in Part 3, but one of the most compelling reasons for building a custom 2.5D engine over existing 3D engines is the level editor experience. Before I discuss it, let me present a little demo of the current level editor experience. Something should strike you as very strange about the editor.
Did you see it? There are layers in the level editor!
Whoah, whoah, whoah. I thought we just got rid of layers. Doesn't that bring us full circle?
The reason we have layers in the editor goes back to the usability of the level editor. It can be really tough to reason about and manipulate a 3D environment, but 2D environments are easy. In this case, we didn't bring layers back to the engine that we removed earlier. Rather, we allow the designer to edit the level in the context of layers in order that the overall design experience is better.
A couple of key things about this editor that are significant are that we allow the user to confine editing to a single layer and that we allow the user to toggle the visibility of elements in the level.
This is a very cursory look at the functionality of the level editor, and I hope to revisit it in some later blog post(s) down the road.
End of the Road
So there you have it: a little bit of glimpse into our path toward a better 2.5D game. In this post I touched on a few different things very briefly that each could be discussed at length—and perhaps I will at some point. Let us know on our Facebook page or via email to contact@solovid.com if you would like to hear more about any of the topic areas discussed in this post, and perhaps we'll get into that more!
In the meantime, seek first the kingdom of God and his righteousness!